The Liberty Bell March by John Philip Sousa is an iconic Sousa march that is perfect for elementary music class. This piece has a fun featured bell part that is just begging for an instrument play along. So that’s exactly what I did. Read on to learn all about this Liberty Bell March activity.
John Philip Sousa: The March King
John Philip Sousa is sort of the All-American composer. He was the child of two immigrants, born in Washington DC. His father was a musician in the Marine Corps Band. He even got to enlist in the Marine Corps Band early because of his father’s connections (and to keep him from running away with a circus band!).
After a brief stint with a theater band, he rejoined the Marine Corps Band as an adult, He stayed there for over ten years, and then created his own band and toured around the world for the remainder of his life. Because of the prolific number of marches he wrote during his lifetime, he has been given the title of The March King.
What Is the Story of the Liberty Bell?
We’ve all heard of the Liberty Bell. But how do you know about it’s story? The Liberty Bell was rung on July 8, 1776 to call the citizens of Philadelphia to the very first public reading of the Declaration of Independence. The bell also took on significance during the abolitionist movement as a symbol of freedom. The famous crack in the bell led to the bell being unusable. The very last time it rang was in honor of George Washington’s birthday.
Liberty Bell March by John Philip Sousa
Listening to the Liberty Bell March
We start by previewing the Liberty Bell March by John Philip Sousa using a listening map. That way they are familiar with the different sections and how they sound when we start adding movement. Students can follow along on the board or with their own copies.
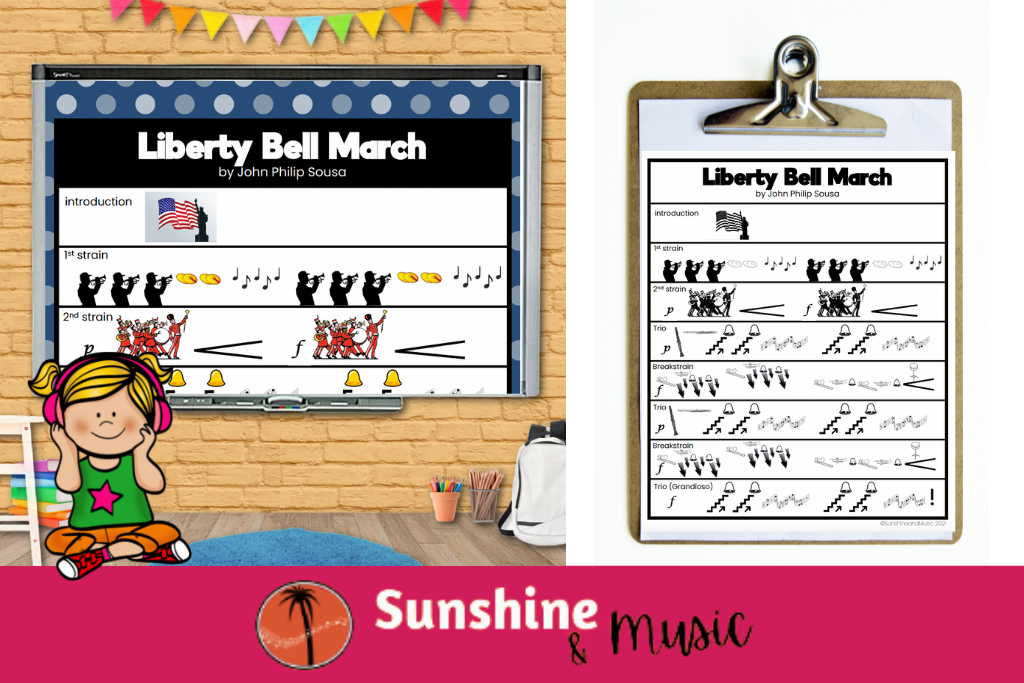
Click here for the Liberty Bell Listening Map.
Movement Activity for The Liberty Bell March
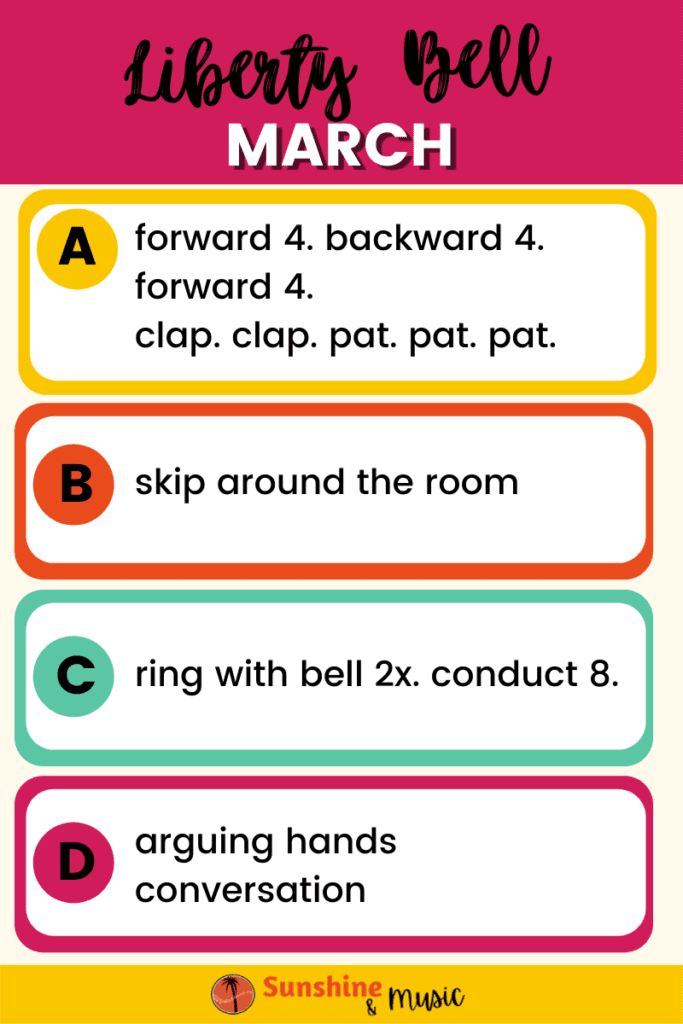
Next we add the movement activity. Here are the moves for each section.
First Strain: March forward 8. March backwards 8. March in place 8. Clap. Clap. pat pat pat.
Second Strain: Skip around the room
Trio: Get ready. Pretend to tap fingers together like you are playing a triangle on the bell part. (Repeat) Pretend to conduct.
Breakstrain: Arguing hands – one hand represents the high brass and the other represents the low brass. At the end of the breakstrain, hands make a large circle and prepare for the trio.
Adding Triangles to the March
The instrument that I choose to add for the bell part is the triangle, but really anything that rings could be good. Finger cymbals would be another great alternative. Depending on the class that I have, I can add them with the original movement activity. For classes that need a little more structure, I make some adjustments.
In the original version, students make sure to be back to their spots with plenty of time to sit and play the triangle during the first C section. In my more structured version, I may have students sit the whole time and have the first strain be clapping the beat and the second strain be tapping the beat on your lap.
You will also have to decide how to take turns on triangles. I don’t really recommend EVERYONE on triangles at the same time, but if the attention span of your kids is only one time through the Liberty Bell March, that may be what you choose. Or you can have students pass instruments to the row behind them during the breakstrain.
Liberty Bell March Listening Map
When following along and playing the song, I highly recommend using a listening map. It really helps them be ready for the bell part when it happens, and recognize the form of the song. Here is the listening map I use with my students.
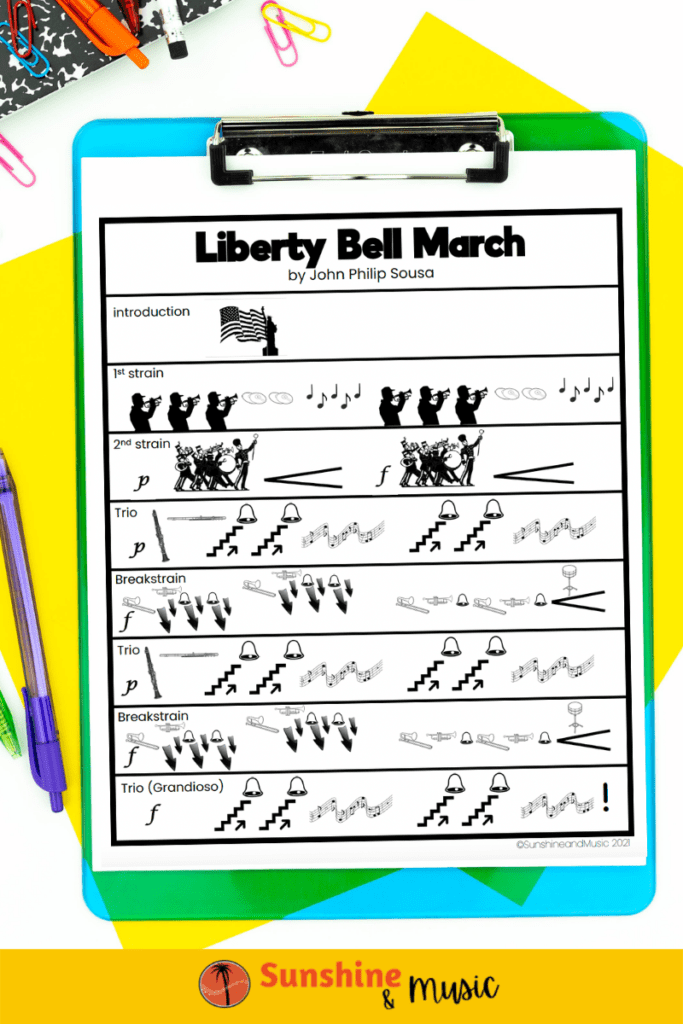
Click here for the Liberty Bell Listening Map and Worksheets.
I hope this activity is a hit in your classroom. I think my students like the arguing hands during the breakstrain almost as much as they liked playing the triangle!
Enjoyed this post? You might also like:
3 Ridiculously Fun Lessons on Groups of Percussion Instruments




One Response